My son loves art projects. I always had art supplies on hand for him to scribble with crayons or markers. Then we discovered the PBS show “Noodle and Doodle” where they always make a themed craft project with coordinating snack. From then on he was hooked. “I know Mommy!” he tells me often, “Let’s do a project, RIGHT NOW!”
Fall is a perfect time to do art projects that incorporate fall leaves in all their brilliant reds, oranges and yellows. I looked up a few possibilities online and I had a hard time picking just one that he might like. So, voila, 3 easy fall inspired art projects to share with you.

Preparation
The first step was to go out and collect some fall leaves. Many of the leaves are still green, but we do have a line of sugar maples on our property which always turn colors early. Me, my 3 yo son, and my 1 yo daughter got a basket to put our spoils in and went hunting for leaves. We also found some pretty native flowers (aka, weeds). The kids had a blast, though I definitely found myself discouraging them from picking brown and disintegrating leaves. “Let’s get nice, bright red ones!” I insisted. Or “Look, over there I see some nice yellow leaves!” We collected a lot of leaves knowing that we would be making more than one project with them.
Once we were back inside we got the fattest books we could find, lined the pages with tissue, and pressed the leaves and flowers between the pages. We put them in and then forgot about them for a couple days.

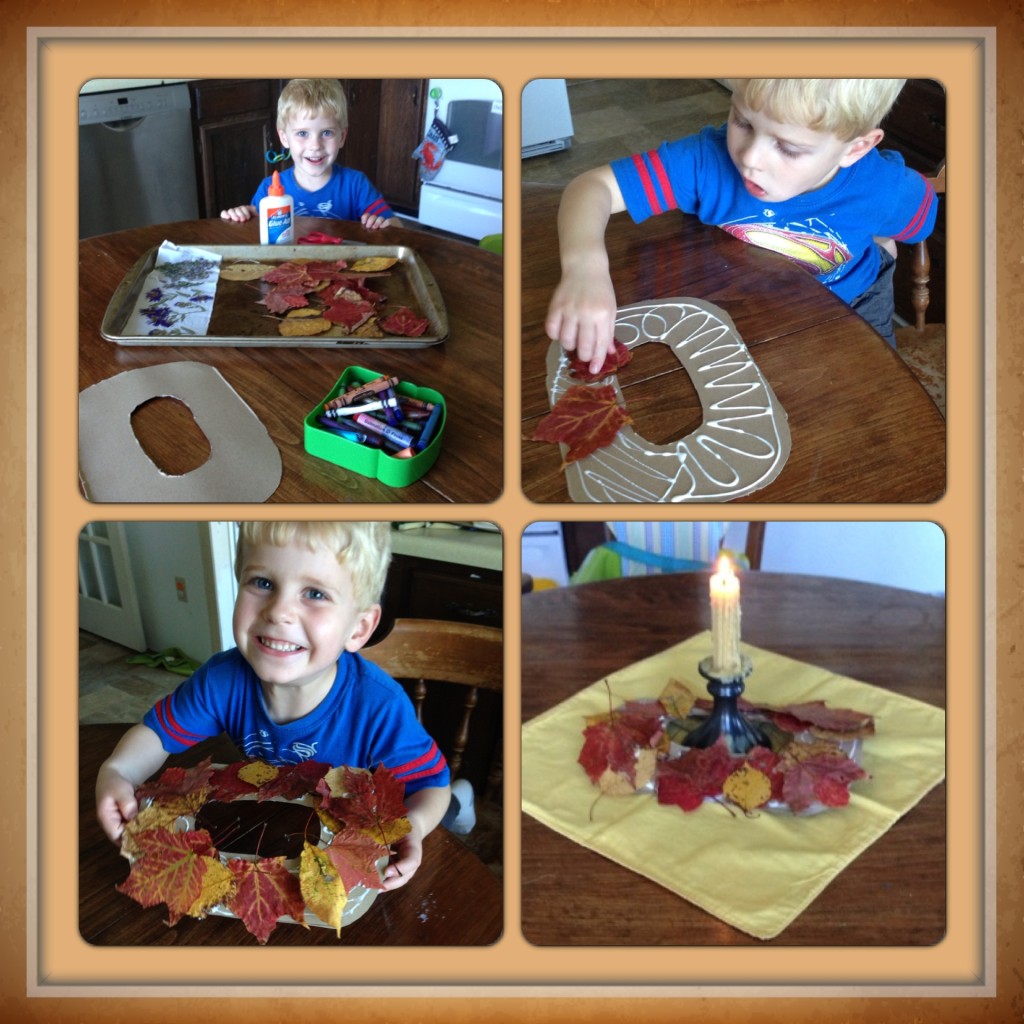
Craft 1: Table Wreath
This craft requires leaves, Elmer’s Glue, scissors, and a paper plate or recycled cereal box. Cut the middle out of the paper plate with scissors (or create your own ring shape using an old cereal box). Cover it with glue and let your child go to town sticking the pressed leaves to it. It’s good for short attention spans because it only takes about 5 minutes once you get to the leaf part. Arrange it on a colorful tablecloth or napkin and put a candle in it.
Craft 2: Leaf People Art
This is the easiest of all the crafts. Have your child select one leaf they like and glue it to the center of a colorful piece of paper. The points on the leaf look like arms, legs, and a neck. Have your child draw themselves with the leaf as their “belly.” They can give it arms, legs and a head. Write their name lightly so they can trace it with a crayon. Make multiple leaf people if you like. It’s a quick, fun craft and makes a really cute piece of seasonal art for your fridge.

Craft 3: Autumnal Trees using Toilet Paper Rolls
Cut a large circle or oval out of a paper plate or a recycled cereal box, this will become the top of the tree. Cut two slits in the top of an empty toilet paper roll. The circle will slide into the two slits so that it looks like a tree. Smear glue on the circle and let your child glue pressed leaves or flowers into it, (you can also use balled up pieces of fall colored tissue paper). Let it dry, then slide the treetop into slits on the toilet paper trunk. My son had a fun idea of using two toilet paper rolls for one tree so that it could be extra tall. We made one tree with pressed leaves, and another with pressed flowers.

My son and I had fun making these projects, and it was good that they are quick, 1) for his attention span, and 2) because my daughter was too little to really participate so had to entertain herself while we made them. Don’t be afraid to let your child take the project in their own creative direction too.
Happy Fall!


Excellent! I love these, I will be trying these with my kids this week, thanks!
Those are great! I can’t wait until my kids are old enough to do crafts!