When I discuss inventions, I love to ask why it’s important to let kids take things apart:
“If you were to design a drill to drill into rocks on Mars, how would you know what to build?”
I’m an aerospace engineer, artist, parent, and STEM educator. (STEM/STEAM means Science, Technology, Engineering, [Art], Math). I’ve designed parts of Mars Rovers, underwater robots, and medical implants that enable the blind to see. I have also spent a ton of time teaching kids how to use tools, explaining how to take things apart safely, and enabling them to build new things themselves. This is something I wish I had experienced as a kid.
When I ask the drill question I get lots of creative answers from kids ranging from LEGOs to construction equipment. It’s fantastic. There’s no one right answer. As an engineer, I can say that we often look at existing things that drill in rocks. (If it works, why not use it). Engineers might look into things like small handheld impact drills for putting in anchors for shelving in your basement or giant drills used for making oil rigs, and see how they work, often by taking them apart.
Yes, adults get paid to buy toys and then take them apart. It’s pretty awesome. The best way for adults to learn how to do this is by starting when they are kids. This is why I think it’s very important to let kids take things apart.
When I worked at NASA, we found that a lot of brilliant engineers got started using tools and learning how things work by playing with a “cool dad in a garage”, often in woodworking, automotive repair, etc. Recognizing that not all kids have these opportunities (myself included), some friends and I got together and started a STEAM education program with the goal of providing the “cool dad with a garage” experience to all kids, not just those with cool dads and garages, and with a focus on girls who often aren’t invited into those garages. We taught hands-on tool skills future engineers, artists, and homeowners would need.
We started with offering workshops to let kids take things apart because nothing covers the essentials of tool use and how things work better than getting in, getting messy, and destroying an old VCR. Since then I’ve run a lot of Taking Things Apart workshops and destroyed many evil baby toys (you know the ones you hate), radios, VCRs, DVDs, power sanders, etc. I can now tell you a lot more about how they all work.
Why should you let your kids take things apart and get messy?
- They learn how to use tools safely (while doing something immensely satisfying).
- They learn how things work (so they can maybe fix them or invent something new).
- There is no better way to destroy data on an old hard drive than an 8-year-old with a screwdriver.
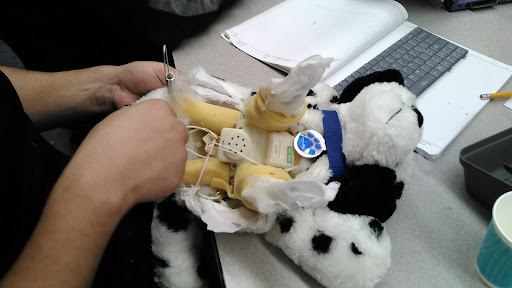
- That baby toy that just won’t go away… you know the one that talks and sings… gone for an educational purpose.

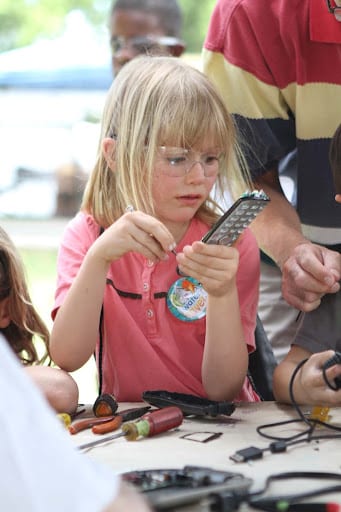
A high school students explores how a walking dog toy works.
When you teach kids to use tools through fun activities, they build comfort with them while also learning how to use them safely. This means that later in life, should they choose to go into STEM, arts, the trades, or just fix up their own bike, car, or home, they’ll be better prepared. Tools aren’t just stuff you find in a garage. Tools can be anything from a mixer in the kitchen to a sewing machine, paintbrush, screwdriver, saws, and more.
“But,” you say, “I don’t know how things work!”
Excellent. That’s perfect. (Yes, it seems scary initially, but you’ll get over it when you see how much fun and learning they’re having.)
When you let kids take things apart you are there to provide two very important things:
- Inquiry – Guide them by asking annoying questions. DO NOT LECTURE!
- Safety – The goal is an orderly dissection, not a smash and stab.
Inquiry: Ask these kinds of questions while you take stuff apart:
- What do you think this thing is? (They likely have never seen a VCR nor understand that there’s likely a Disney movie still stuck inside it that is made of miles of magnetic ribbon!)
- Can you find where the parts come together? Do you see any screws?
- What do you think that part does?

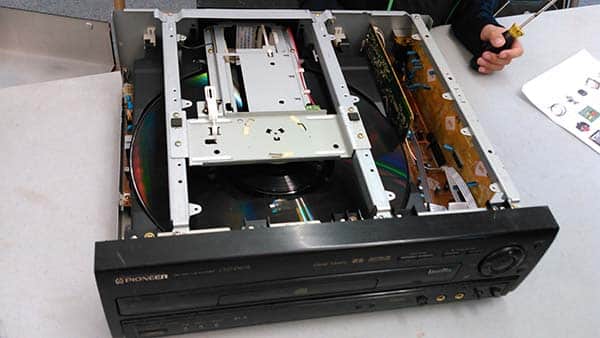
Kids take apart a laser disc player. - What do you think that part is?
- Why do you think this part is bigger, thicker, etc. than this one?
- Did we see something like this before?
- What could you use something like this for?
If you happen to know the answer to any of these questions, you can throw in some ideas, but let the kid lead. And above all, don’t be that boring person who drones on and on about the stuff inside… ugh.
Safety: It’s best if an adult can work with the kid to do the dissection. Here are the safety rules I stress in any of my workshops (and with my kids).
- ASK an adult first. Make sure the appliance is not needed anymore. (See my list of acceptable appliances below).
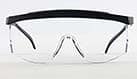
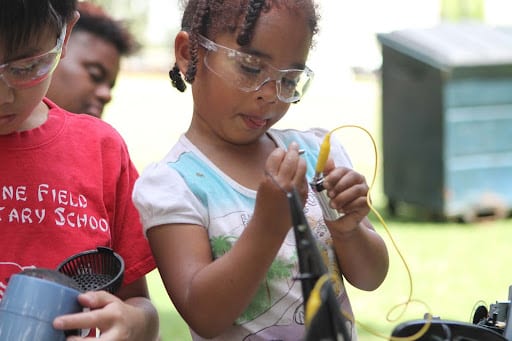
- Wear SAFETY GOGGLES. Everyone in the room should wear them in case something goes flying. It’s not that we don’t trust you, it’s that we don’t trust the person next to you. I buy kid-sized goggles from Home Science Tools (because I happen to fit into kid-size myself… sigh, the life of being a scale model of a human being.)
- UNPLUG the appliance, and remove any batteries before you do anything else. The safest thing to do is use appliances that have not been plugged in for over a day. Never plug in the appliance as you are taking it apart. I often cut the plug off of appliance cables first if I think a kid might be reckless/tempted.

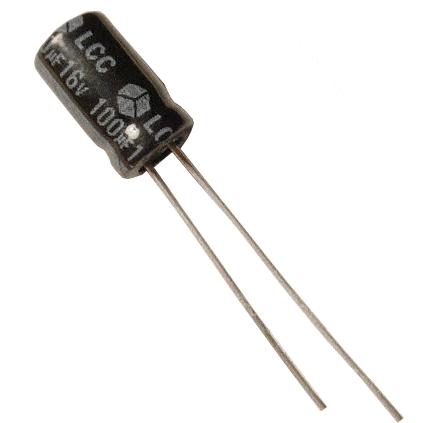
When you see capacitors like these, assume they are charged. - If the appliance was plugged in recently, assume the CAPACITORS are CHARGED. Capacitors look like very small black or blue soda cans (as shown to the right). Before touching circuit boards with these capacitors on them, use an INSULATED (plastic handled) SCREWDRIVER to touch the capacitors across the 2 leads (two metal wires) to SHORT them out. If they were charged, they will make a bright blue spark and a pop sound. Then they’re discharged, and safe.
- WASH YOUR HANDS with soap and water after you are done. Some electronics may have lead oxides on their circuit boards, which are bad if you eat them. Never eat or drink while working. If you’re working in a clean space like a kitchen, you may wish to put a cover material (paper, plastic, cardboard) on the table to enable easier cleanup later. Wash the surface with soap and water after you’re done too.
Let’s get to it. Here’s how you take stuff apart. Your results will vary.
- Set up some tools and some broken stuff you don’t want anymore. Do not expect it to work again.
- Review safety with your kids. Remind them that they’ll be doing a disassembly, not smashing. Plus, if you keep chunks (also called sub-assemblies) together, you can sometimes make them work again or repurpose them.
- It’s worth reviewing how to turn a screwdriver (see my suggestions below).

She is taking apart a cordless phone and seeing all the cool pieces inside. - Have the kid pick out something to dissect from the pile. Ask them if they know what it is/does.
- Look for seams and screws.
- Find the right tool and take things apart. Let the kid lead. Take photos or sketch as you go so that you know what went where.
- If you find a battery, pull it out for safe battery disposal. Never stab or break open a battery!
- Get stuck? That’s ok. Not everything was designed to be serviceable. That in itself is a great lesson. Switch to another object to take apart.
- Find cool stuff? If you found speakers, you can try hooking up a battery to see them move, or just use them as fridge magnets. If you find motors, see if you can hook them up to a battery and see them move.
- Make something fun and artsy out of all the pieces… what can you make using all the letters from the keyboard?
- When done, deposit circuit boards in e-waste, batteries in safe battery disposal (check if your hardware store has a collection point) or e-waste, and trash and/or recycle the plastic and metal.
- Clean up your workspace, wash down the table, and wash your hands with soap and water.
Tools!
You don’t need much. Most things can be taken apart with a fairly small set of tools. I recommend making a Taking Things Apart toolbox set aside specifically for your kids (for both pride in ownership and so they don’t take [and hide and lose] your stuff) with these starter tools:
If you have the budget, grab these as well:


You can find inexpensive tools at your local hardware store, big box home improvement store (Lowes or Home Depot), Harbor Freight, or at a thrift store.
Here are some things that are great for taking apart:
Orbital sander, belt sander, toaster, toaster oven, fan, blender, juicer, mixer, food processor, electric can opener, hair drier, coffee maker, electric screwdriver, waffle maker, VCR, walkman, CD/DVD player, document scanner, CD drive, electric or geared pencil sharpeners, phones (corded & cordless), mechanical/noisy baby toys, toy laptops, RC cars, keyboards, computer mice, etc…
The older the machine, the better. If you have a young child (age 5) interested in a take-apart, I recommend computer keyboards and old corded phones. These come apart with 3-4 screws and have lots of fun pieces you can play with.
Things to not take apart:
- Vacuum cleaners (especially other people’s vacuums) – They are full of dust and allergens. Absolutely don’t try to clean a vacuum using an air compressor (lessons learned…).
- Microwave ovens – Risk of electrocution. They contain large capacitors that are dangerous because they store large amounts of electricity even after they’ve sat unplugged.
- Smoke detectors – Radioactive material may be present.
- Mercury thermostats – Do not handle mercury.
- iPhones or Nintendo anything – They use specialty fasteners that require special tools to open. (You can drill the screws out, but that makes the activity less fulfilling for kids).
Finally, here are 3 great ways to explain how to turn a screwdriver, wrench, or cap to any jar.
My preference (and regular go-to) is the Right-Hand Rule because it works great on stuff that’s right side up or upside down. Pick what works best for your kiddo:
- “Righty tighty, Lefty loosey”
- “Lockwise, clockwise”. To tighten, turn the screw the same way the clock turns.
- Right-hand rule. Do a thumbs-up with your right hand (pledge of allegiance hand). Point your thumb in the direction you want the screw to go. Turn the screwdriver in the direction your fingertips are pointing.

For more advanced fun…
After you’ve taken apart something, grab a 9V battery and two wires with alligator clips on them (search for “test leads” online or at Amazon). Connect the battery to the ends of motor wires, LEDs, speakers, or fans. See what happens. Most of these devices run on 3-5V, so at 9V you’ll get some very fast/bright behavior before stuff burns out. I love hooking up batteries to the motor on a printer’s print head and making it fly across the printer at extraordinary speed.
After wrapping up one of my first Taking Things Apart workshops, we got a very happy email from a parent. She and her daughter had just finished our session and were on their long drive home. On the way home her daughter had a sudden and very excited realization– the car was held together with screws…and she wanted to take it apart. Her mother, with a laugh and smile, urged her to at least wait until they got home.
Once you let kids take things apart, you never know how far their imagination will go. Happy tinkering!
For more near you, look for Taking Things Apart workshops offered in schools, museums, makerspaces, or look for a local Repair Cafe.
Pin this post and be sure to follow Vermont Mom on Pinterest!
 Vermont Mom Insiders get exclusive content that you do not want to miss, so sign up today!


