My husband and I are both artists and we really enjoy being creative with our daughter. Recently, we’ve had fun with some easy fall art projects.
In my most recent post, I highlighted ways to approach making art with young children, particularly those under five-years-old. I wrote at length about my favorite way to make art with kids: by focusing on the process, and not the end product. So many friends have told me that they aren’t artists and feel like they just don’t know what to do, or doubt their own skills when it comes to drawing or painting with their kids or alone. Not focusing on doing something the “right way,” or creating a “perfect” end product takes the pressure off both you and your child and leaves room for fun in exploring creativity together. Think of it as art for the sake of making art!
To build on my previous topic, here are two low-cost, easy, and fun fall art projects for kids that literally anyone can do. For even more ideas, check out my Pinterest board.
Nature Process Paintings
Set-Up: Less than five minutes
Materials: Paper, masking tape, found items from nature, washable finger paint
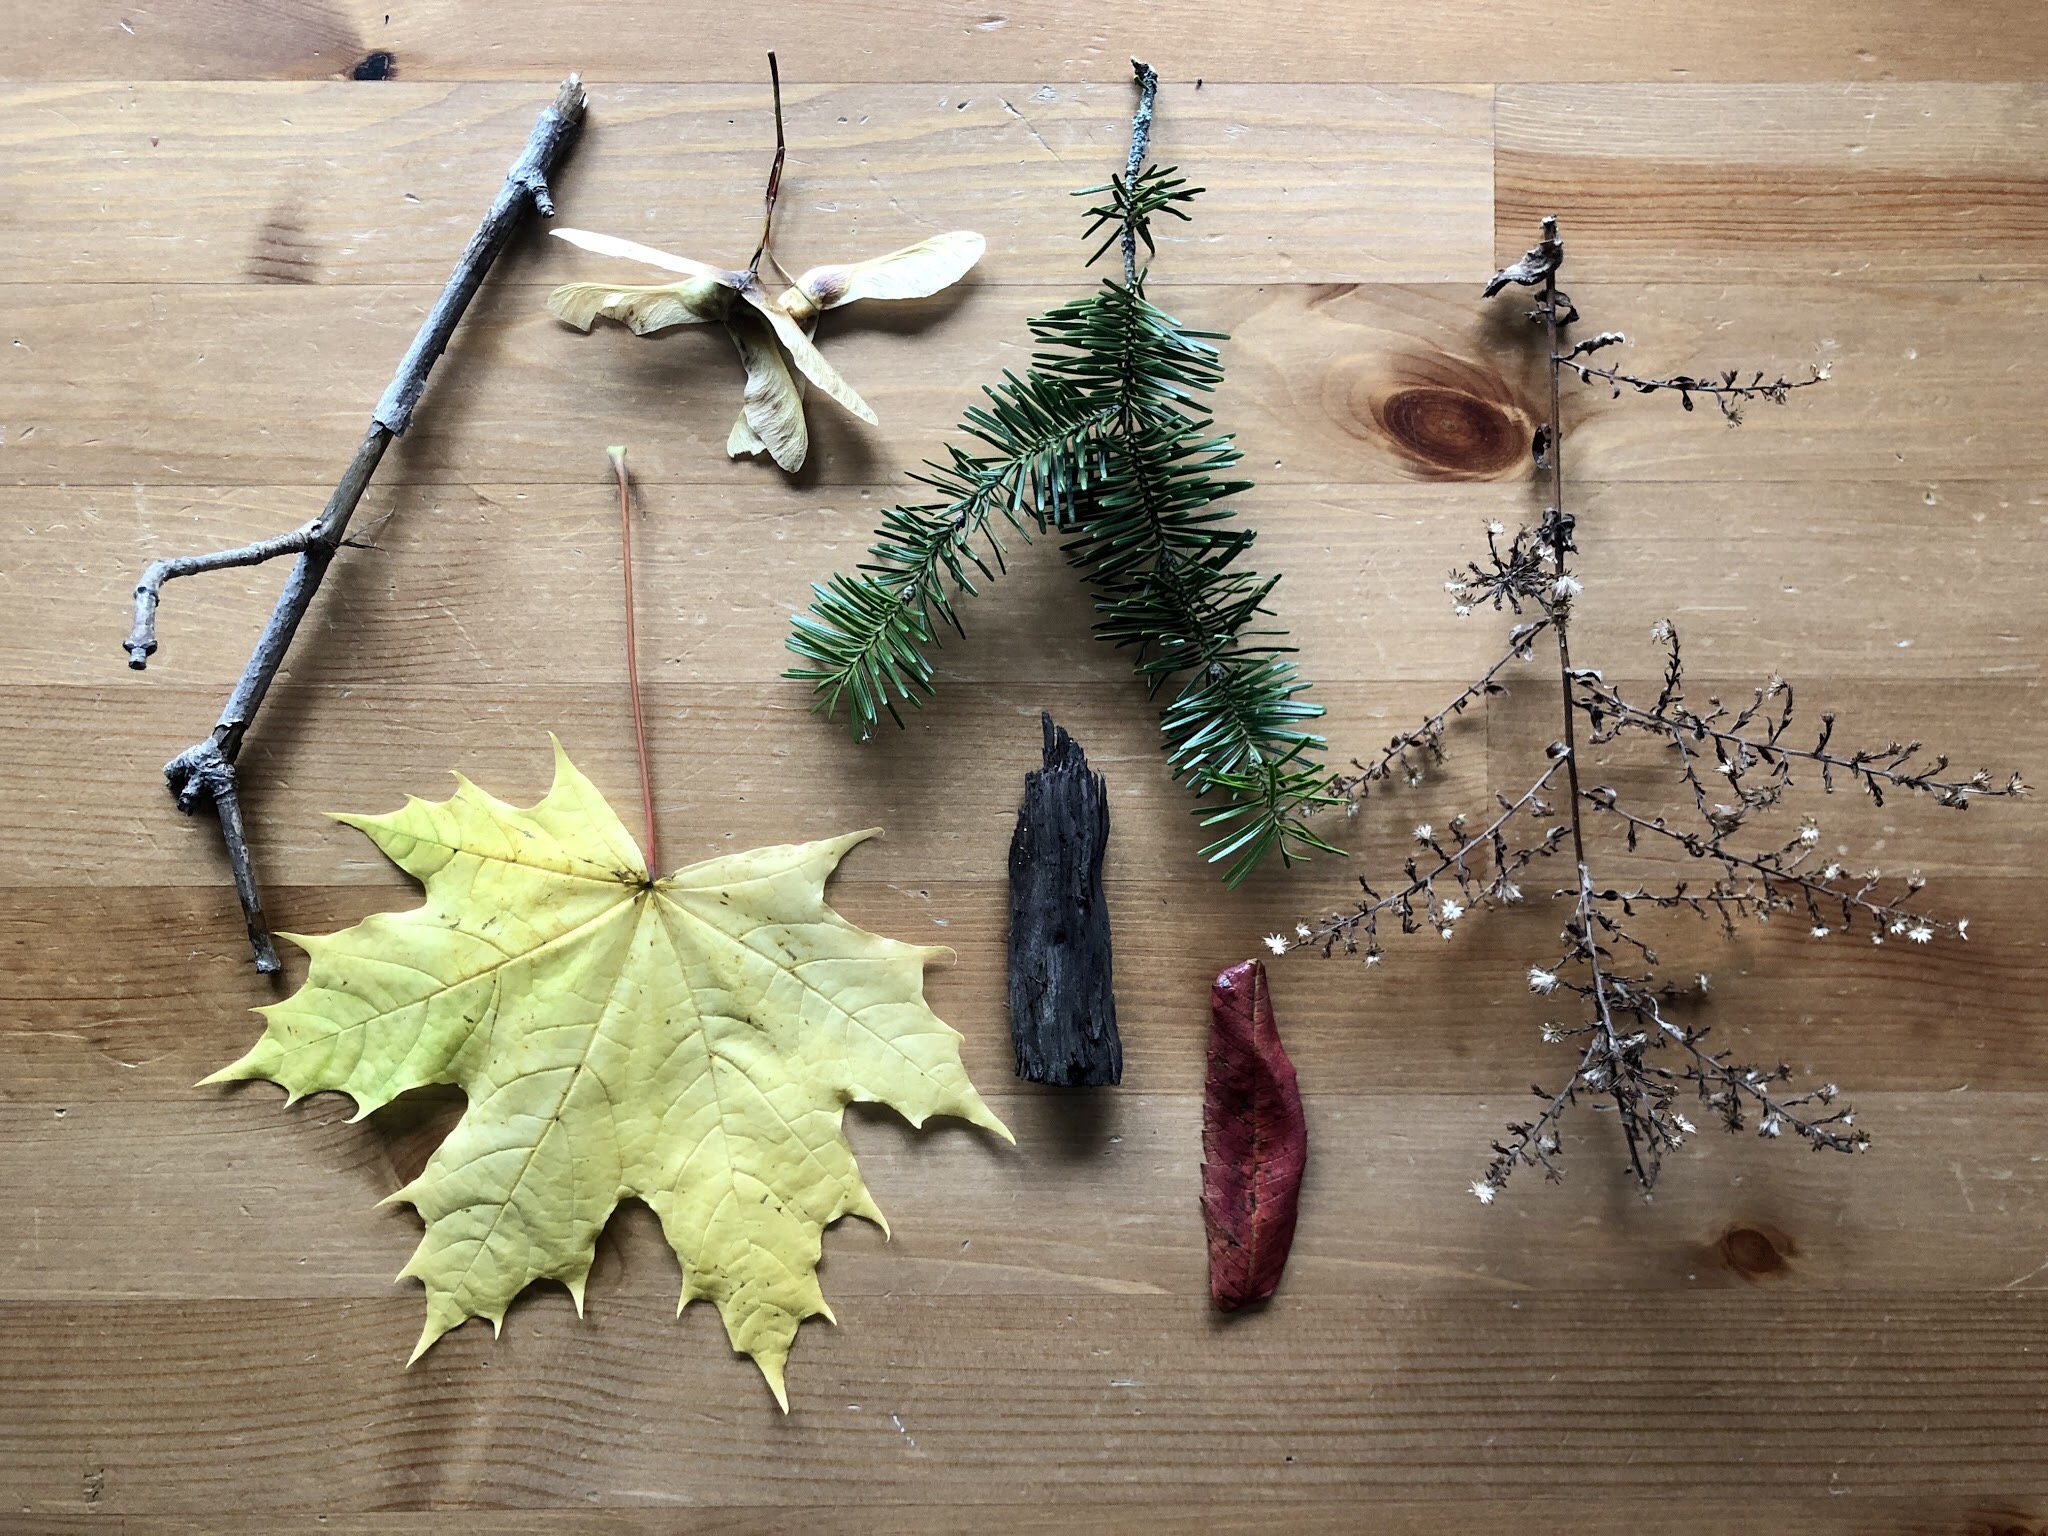
To start, you’ll want to collect items from nature to replace the paintbrush in this project. I took less than two minutes to run into the backyard and gathered two leaves, some bark, a stick, an evergreen branch, maple seed pods, and the branch of a weed. If you wanted to extend the project, you could take your child for a nature walk and collect items together.
Next, you’ll want to set up. I taped two pieces of cardstock together and then straight onto our dining table. If you want to protect the surface of your table, you could cover it with newsprint or cardboard. I only use washable paints with my daughter to avoid this step.

Put the paint colors you want to use out on the paper. You can see I arranged the colors in a rainbow, but you could use whatever colors you like that fit the season or your little’s preferences. If you want to practice fine motor skills, you can have your child help open and squeeze the tubes.
Now comes the fun part – art-making! Model for young children how they can dip the natural pieces in paint and roll, scratch, and move them across the paper in different ways. This is a fun way for both of you to take the pressure off and simply create for the sake of creating. Seriously, you cannot do this part wrong. Have fun and explore how the different items create varying textures and shapes. You might surprise yourself with what you can make by letting go of expectations of the end result.
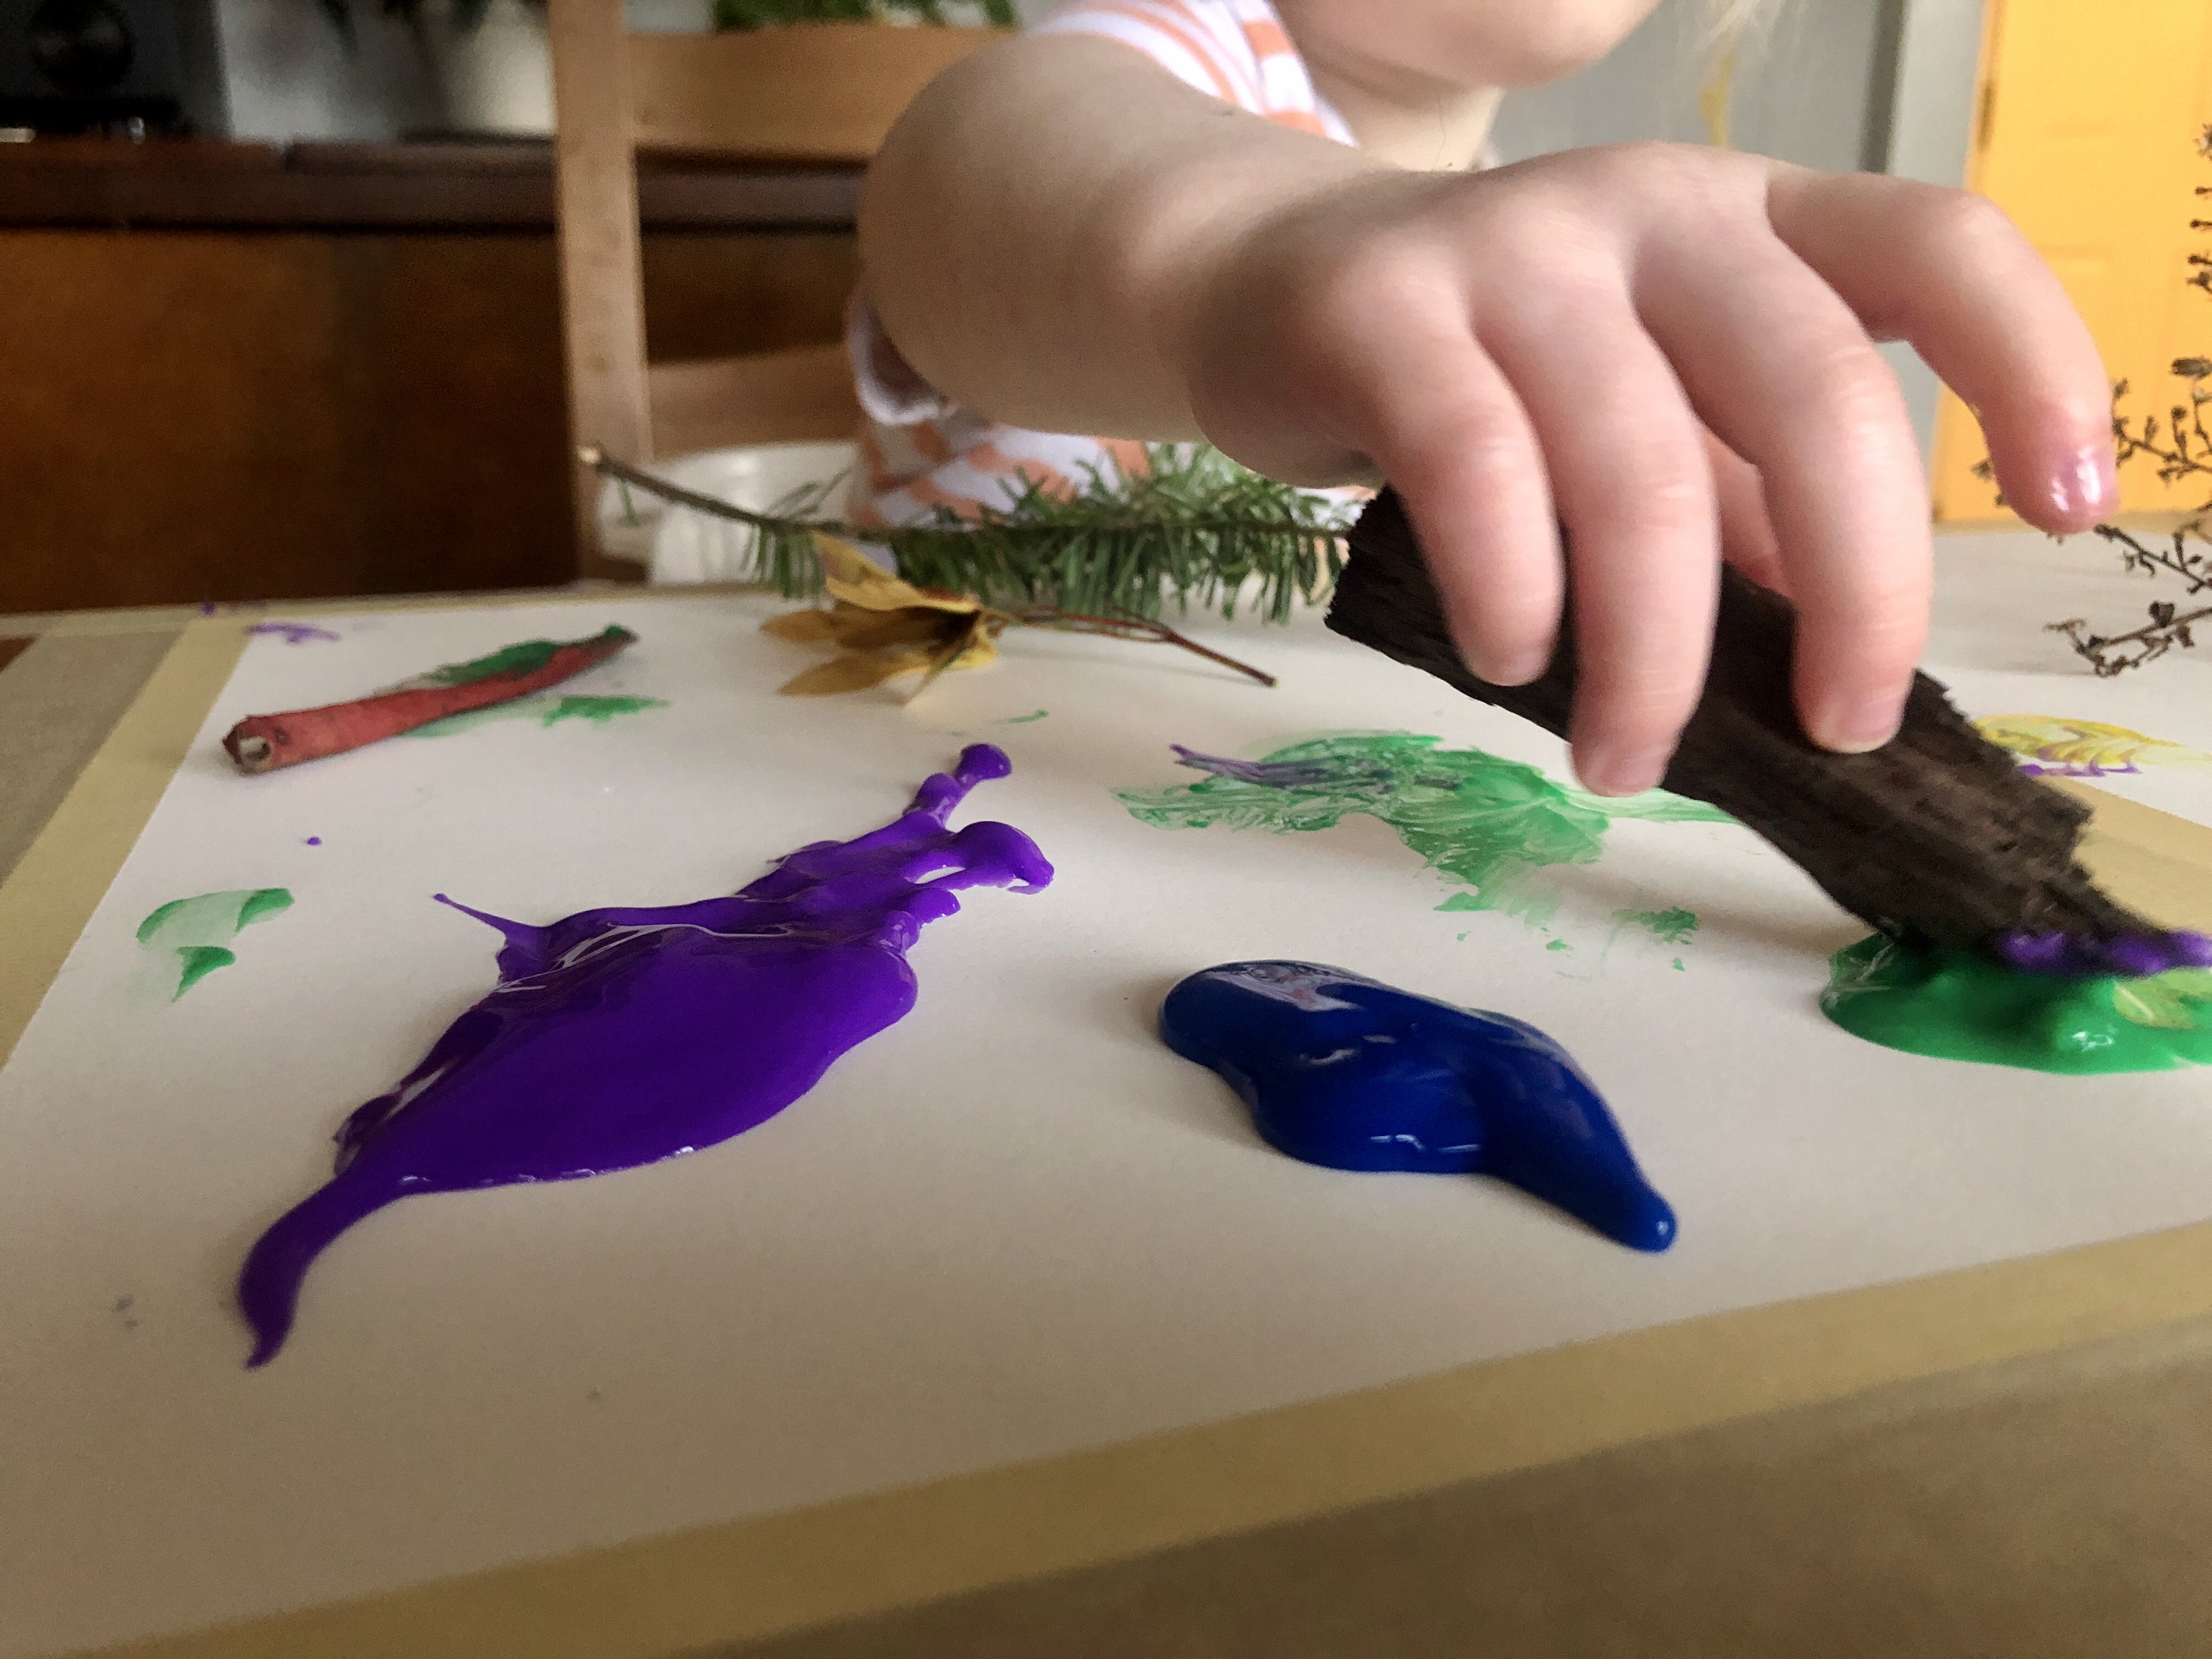
My 2-year-old daughter painted this way for about twenty minutes. This might not sound very long to you, but it might be a new record for her. By swapping out the brushes for new objects she stayed engaged for much longer than usual. When she was all done I removed the tape and the washable paint came right off the table with a wet paper towel.

I put one of these final pieces in a frame and folded the other in half to send as a card to a family member.
Fork Turkey Paintings
Set-Up: Less than five minutes
Materials: Paper, washable finger paint, plate, plastic forks, glue, brown construction paper, orange construction paper, black marker, scissors.

To set this one up, you’ll want to once again tape white paper to your work surface. You can skip this step and omit the tape, but I’ve found it easier for my child if the paper stays in place. Then, squeeze some of each color paint onto the plate and put a fork in each one. I used traditional Thanksgiving colors and put out brown, orange, yellow, and red. 
Let your little one go to town with the paint to create the turkey’s plume of tail feathers. If they’re really young, you might have to show them how to dip the fork in the paint and stamp it on the paper. Again, there’s no way to do this wrong. Have fun, and remember that if you’re putting paint on paper, you’re doing it right!

To make the turkey shape, draw a circle and an oval on top of each other on the brown construction paper, resembling a snowman. Cut it out, and on the circle draw two eyes with the black marker. Cut out a small triangle for the beak, and glue it to the paper.

When the paint dries, glue the brown turkey body to the painting. If you like, you can cut the edges of the paper to resemble feathers or leave it as-is, like I did.
Do you have any fall art projects planned? Share your ideas with us in the comments.


