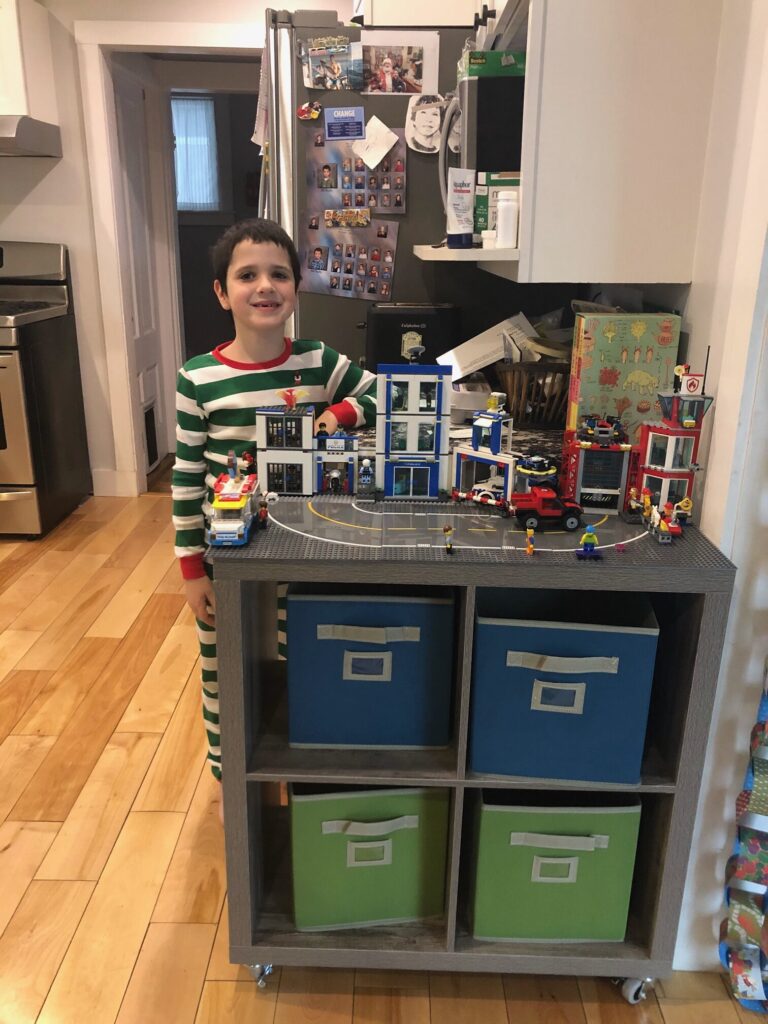
At some point in the fall, I was observing my two kids (ages 6 and 7, at the time) playing with LEGOs. They were sifting through their LEGOs on the teeny, tiny LEGO table that they’d had, at this point, for about four years. They were rapt, looking for the perfect pieces, and using those pieces to build a very detailed raptor paddock. They were also hunched over and they looked like absolute giants. This tiny LEGO table was loved and at one time, it had been perfect for their size and building needs. But they had clearly outgrown it.
The table looked like it was going to be crushed under their weight and intensity.
At that moment, I decided that they needed a new LEGO table for Christmas. I mean, LEGOs are the best gift, so why not encourage their obsession? I enthusiastically began my search. But, my search results were rather underwhelming. There was nothing even close to what I wanted (for them, of course).
I wanted a table with a larger top – at least twice the size they currently had so that had more area to build on.
I wanted it to be taller, so they could stand while building without so much hunching. Visions of future chiropractic bills spurred my search.
I wanted the table to be easily moveable, so they could take it from room to room with them as they worked on projects. Room to room… and hopefully, someday, right into their bedroom.
And, I wanted it to have loads of storage where we could keep the LEGOs (soooooo many LEGOs!)
However, I couldn’t find anything that offered everything I wanted for my boys. That’s when I decided I needed to just do it myself. Almost immediately, work on our DIY LEGO table began.
First, I needed to shop around. Because, in my enthusiasm (and procrastination), I made a few missteps. I initially ordered a plastic storage shelf which, based on the dimensions listed on the site, would have been perfect. When it was delivered, I discovered that the size listed was more of an estimate, and not a very good one.
But, once we had all of the right elements, we put it together- rather quickly, too.
Then we set our DIY LEGO table up under the Christmas tree and gave all the credit to Santa.

Follow our exact steps to make your own DIY LEGO table:
1. Purchase the Supplies
To make a DIY LEGO table, you need a “table”, 2 LEGO baseplates, 4 storage bins (if they’re not included with the table you choose), Gorilla Glue ($7.89,) and, since we wanted our to be mobile, wheels.
Here are the exact items we purchased to make our DIY LEGO table:
- LEGO Classic Gray Baseplate 15″X15″ (2)- $11.29 each
These two baseplates will form your LEGO top. I chose gray for a neutral color but you could go with any color. The two plates together will give you a tabletop area of 30″ X 15″ which is important to keep in mind when choosing your table. You can save some money by not getting LEGO brand baseplates.
I don’t recommend getting the rolled LEGO tape as it can be hard to flatten completely.
You can get the peel-and-stick baseplates, but I knew we’d be using glue, too (because I needed to be certain that the baseplates would stick to the finish on the table) so I decided there really was no need. - 4 Cube Storage Cubby– $55
If you read the above, you know this was not my first choice. I wanted something with plastic bins that slid in and out more like drawers. I thought I might want space for four LEGO baseplates too. But, the dimensions on this were so perfect that I had to compromise. We measured what height we’d need in order for our boys not to be slumped over the table and so, we were looking for something in the 28-32″ height range. We also needed something with a top surface area of as close to 15″x30″ as possible for the baseplates to fit. - Fabric Cube Storage Bins– $5 each
For LEGO storage, we went with 4 fabric storage bins. To fit in the storage cubby we bought, we needed 11″x11″x11″ storage cubes. You can get these almost anywhere in almost any color. We got two blue and two green that match the LEGO colors pretty closely. - Medium-sized Heavy Duty Swivel Plate Casters with Brakes– $21.99
If you don’t care about your table being mobile, skip this step. If you want your table to move, make sure the wheels you purchase swivel and have a brake.

2. Assemble Your DIY LEGO Table
Now, to put it all together (which was a complete cinch).
- Assemble your storage cubby. Follow the directions that come with it. Ours was together in under 30 minutes.
- Screw in the casters. We screwed in the casters on the four corners of the bottom of the storage cubby.
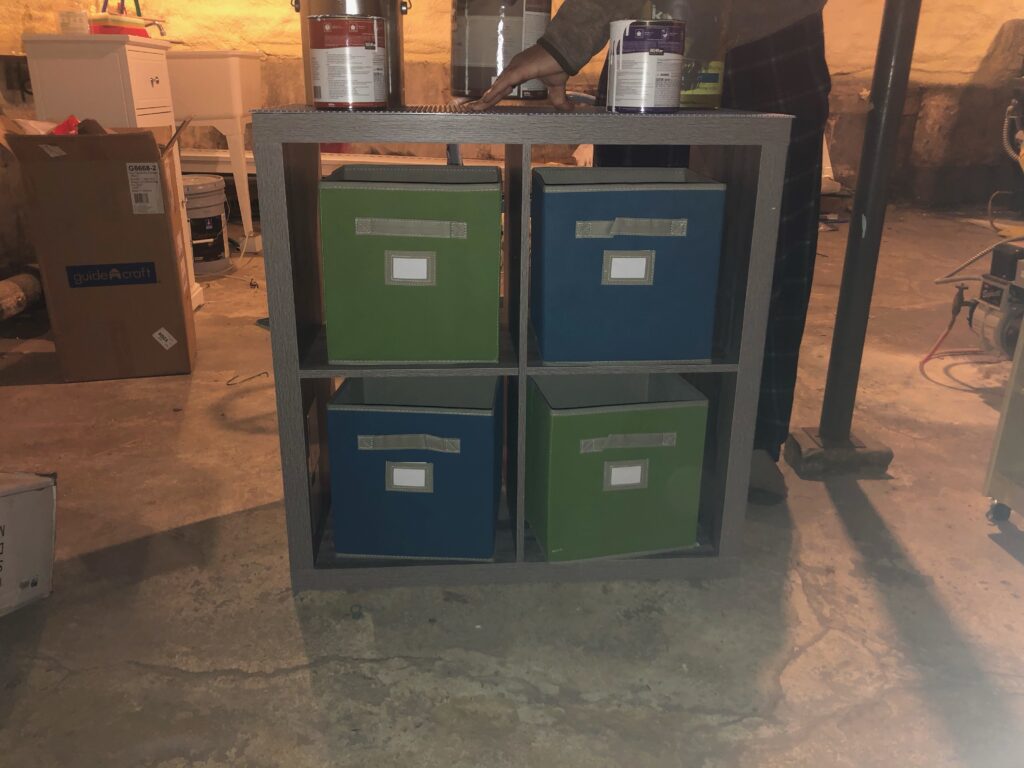
- Glue the baseplates to the top. To make sure the baseplates were lined up properly, we first connected the two baseplates to each other with LEGOs, then we added glue directly to the top of the storage cubby and placed the baseplates on top. We put heavy old paint cans on top to hold it in place overnight while it dried.
- Add the storage bins. Finally, we put the storage bins in. We organized the LEGOs in the bins like this. One bin has large pieces, one has all of the instruction books, and two of the bins have loose pieces.

And that’s all! A complete DIY LEGO table for under $100! Let me know in the comments, do your kids have a sweet LEGO table that they love? Did you have to make it because there is literally nothing out there that’s good enough?
If you have any questions while following these steps, don’t hesitate to reach out!
Pin this post and be sure to follow Vermont Moms on Pinterest!
Vermont Moms Insiders get exclusive content that you do not want to miss, so sign up today!


