By this point it’s no secret, I love to get creative with my kid. I also love sharing open-ended project ideas that aren’t intimidating with other parents. Today, I’m going to share with you one of my all-time favorite holiday crafts – salt dough ornaments and gift tags!
This is an easy and enjoyable holiday craft for kids and adults alike. Making salt dough is a lot like making play-dough: It’s always simpler than I think it will be and I usually have the ingredients on-hand. What I love about this project is that it’s a craft my toddler and I can do simultaneously. She gets to make her own creations, while I’m creating mine. Making salt dough ornaments and gift tags engages a child’s areas of fine motor development, problem-solving, and more.
And here’s the real treat: I can’t promise the same for your child, but all of the scooping, pouring, counting, stirring, and stamping kept my toddler engaged for almost an hour. It was a Christmas miracle!
There are plenty of recipes out there for salt dough, but all you really need to make this easy holiday craft is table salt, flour, and water. If you prefer a more pure white look, you can add white chalk paint to the mix, as demonstrated here. I personally prefer to use recipes with only non-toxic ingredients because let’s be real… my two-year-old is just like my labrador and will put anything in her mouth to test if it’s edible or not. You never know, it could be food! One simply must test it to be sure.
Salt Dough Ornaments and Gift Tags
Time: 5 minutes set-up, 1 hour to make, 2-4 hours bake
Yield: 12-24 pieces, depending on size
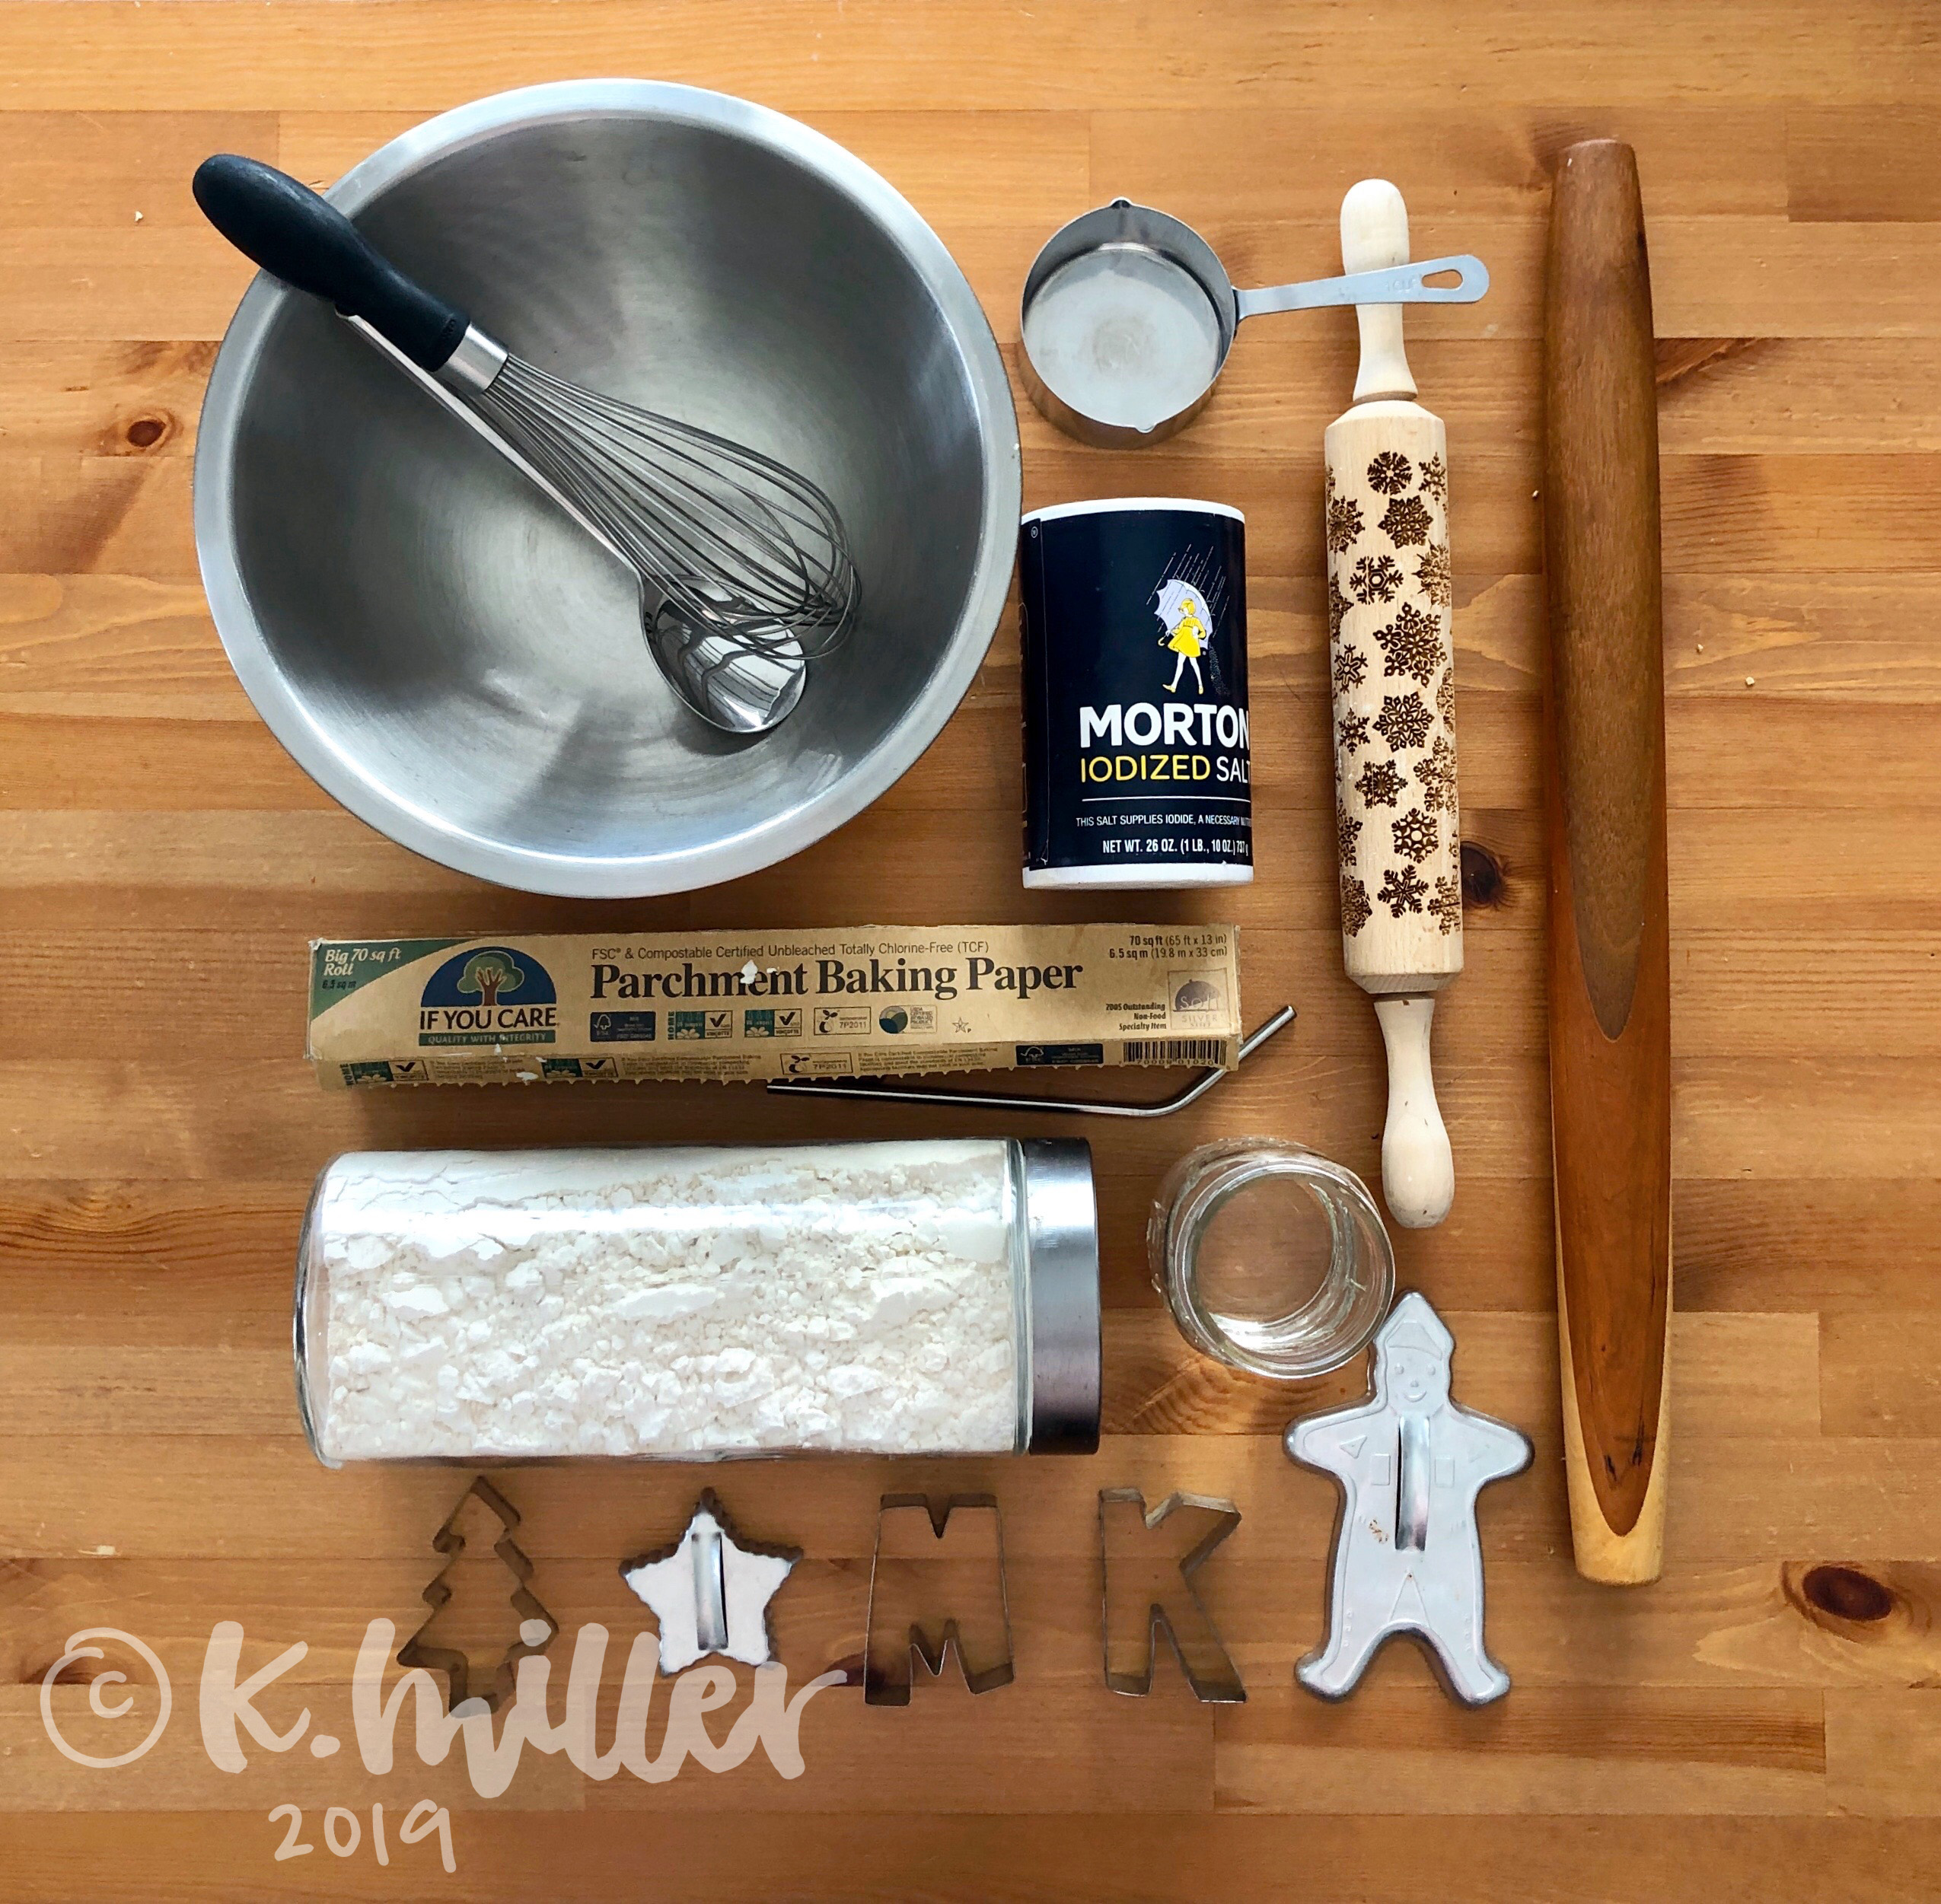
Materials:
- 2 cups all-purpose flour
- 1 cup table salt
- 1 cup water
- Rolling pin
- Cookie cutters
- Measuring cups
- Straw or dowel
- Mixing bowl
- Spatula or spoon
- Parchment paper
- Cookie sheet
- Whisk
Make the dough.
- Gather your materials, above. (No, you do not need to lay them out in such a picture-perfect way, I promise. If it weren’t for writing this, I would have just thrown them in a pile!)
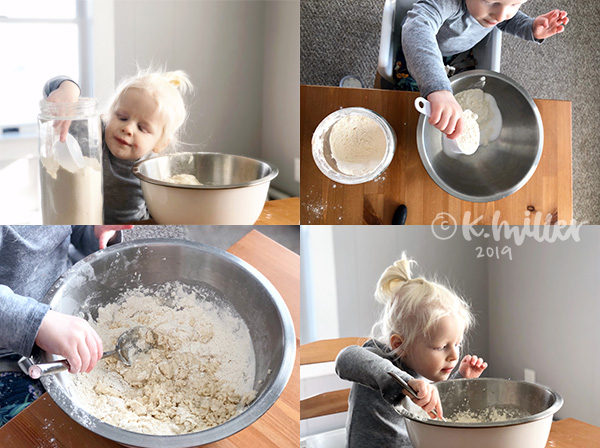
- Whisk together flour and salt until evenly mixed.
- Slowly add water to the dry ingredients, stirring between every ¼ cup or so. If you’re using the method with white paint, substitute half of the water for paint. Keep stirring until the dough forms into a ball.
- Remove the dough from the bowl, and on a lightly floured surface, knead until all of the ingredients are well mixed, or about five minutes. This was a fun moment to teach my little one the word “smoosh!” She had a great time squeezing the dough and rolling it around.

Create your shapes.
- Split the dough into pieces small enough to roll on a single piece of parchment paper. I typically split it into quarters. Roll it out onto lightly floured parchment paper about ¼” thick. Remember, that the thicker your dough is after rolling, the longer it will take to dry out in the oven.
- Tip: If you don’t have a rolling pin, don’t go buy one. You can use a large jar or glass bottle to roll the dough instead. Pretty much any cylindrical object, like a bottle of wine or a jar of pasta sauce will work.
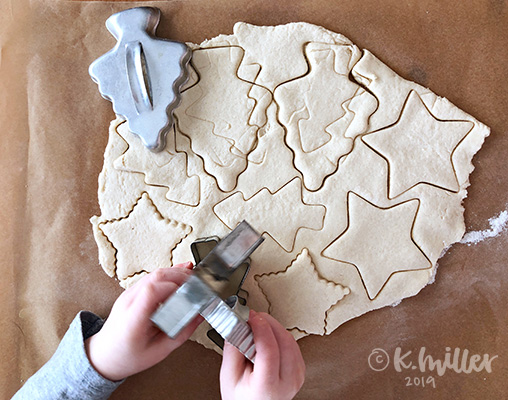
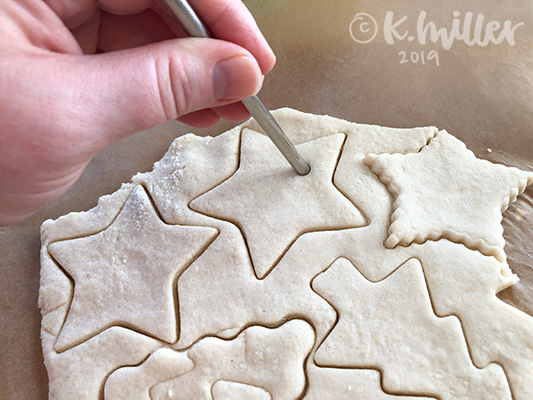
- Once the dough is rolled out, use cookie cutters just like you would when cutting cookies. I let my daughter pick out which shapes she wanted and let her stamp away.
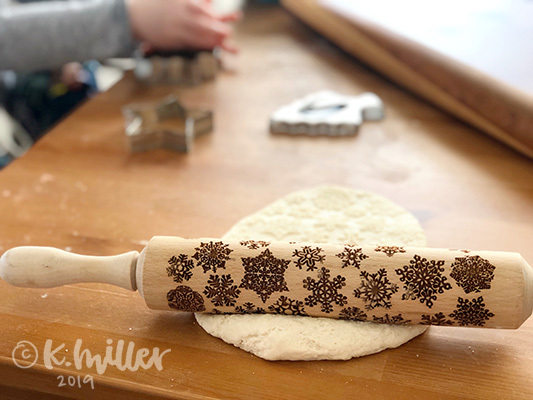
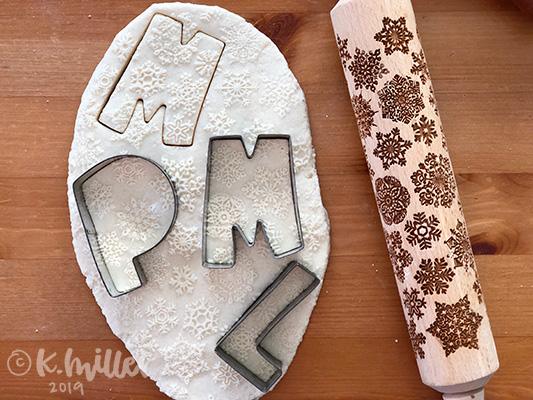
- Note: if you have a vision of Pinterest-perfect tags or ornaments, I would recommend splitting the dough and making those yourself, like I did. Using a stamped rolling pin (from Etsy), I first rolled out the dough to create the snowflake pattern. I then used cookie cutters to cut out the shapes. Easy!
- Using a metal straw or dowel, stamp out a hole in the dough for your ribbon or hanging tag.
- Transfer the salt dough shapes to a cookie sheet lined with parchment paper.
Dry them 1qand show off your hard work.
- Cook in the oven at 200F for 2-4 hours. This time varies widely depending on the thickness of your dough. For example, the thinner ornaments we made took two hours to fully dry, while the thicker ones took three and a half hours.
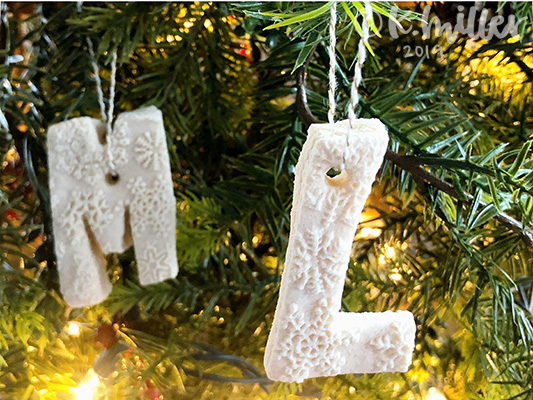
- Cool completely on a wire rack. Add ribbon or wire to hang. When ours were finished, I extended the project and had my daughter paint some of the tags and ornaments, and others I lettered names on for gift tags.
While this time we made shapes, I have also used this recipe to create handprint keepsakes, for both our tree and to give as gifts. There are a plethora of ideas out there on how to use salt dough in unique ways: place cards, garlands, ring dishes, and more. You can also keep any leftover dough in the refrigerator for up to one week to create more ornaments or use as homemade play-dough.
Do you have any holiday craft projects you want to do with your kids? Share them in the comments!


