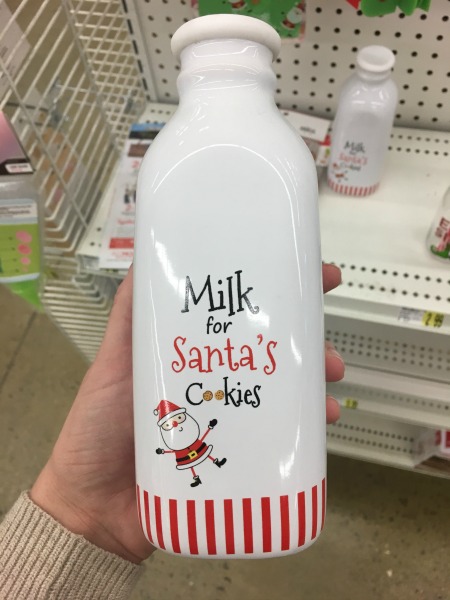
The other day I was in the store browsing through the Christmas decorations when I saw this really cute milk bottle decorated for Santa’s milk. It was so cute but I thought I certainly have enough glass bottles at home, maybe I could make my own version of Santa’s milk bottle! Now in all fairness, I frequently think this and overestimate my crafting abilities but this actually seemed pretty easy and I figured that I could make it as easy or as hard as I wanted depending on my painting and crafting abilities. I also figured that since I was going to use a glass bottle I already have, the cost would be pretty cheap!
Believe me, this is a DIY craft for even the non-crafty mom.
I’ve had a couple of glass bottles that have been waiting for the perfect craft. I loved the shape of each bottle and knew eventually I’d find something to do with them, so I peeled off the labels and saved them. Unfortunately, I did a terrible job peeling off the labels so when it came to using them for this craft, they were still covered in glue.
I thought I would share a few methods I have used for peeling labels off in case you decide to upcycle an old bottle you’ve been saving to create this cute milk bottle.
Mine was from kombucha but I think those Starbuck’s Frappuccino bottles would work great too or maybe you have some of those cute little milk bottles laying around! I think I have had success and failure with all three label-removal methods I tried, so I’ll briefly share each.
The first method I tried is super easy and just requires water. Using boiling water, fill the bottle to the top of the label. Wait a few minutes and peel off the label. This actually worked quite nicely for some of my bottles, while others did not work quite so well Since this was super easy I always think it’s worth a first try.
The second method I tried is to fill a sink with super hot water. Submerge the bottles, filling them with water. Add a mixture of dish soap, baking soda and white distilled vinegar. Let soak and then remove the labels. Some of them required a little scraping but most labels came off easily.
The last method I used was in the cases where I had peeled the labels off and had some glue left over on the bottles.
I mixed equal parts coconut oil (what can’t you use coconut oil for?) and baking soda and a few drops of lemon essential oil. I rubbed the paste on the bottle and let it sit for 15 minutes then washed the bottles. The gunk easily washed off. The bonus to this method is if you have any of the paste left it makes a nice exfoliating hand cream for yourself or for removing paint off your toddler’s hand when she insists on also painting, using the same paint you are, while you do this craft.

So now onto the fun part!
Here’s what you’ll need:
- Glass bottle
- Rubbing alcohol
- Cotton ball or cloth
- White paint (or another color for base coat)
- Pencil
- Other paints, sharpies or supplies to decorate
- Printer (optional)

First, prep your glass bottle. Make sure your bottle is clean and free of any residue. Use a cotton ball or cloth and wipe the bottle with the rubbing alcohol and let dry.
After prepping the glass, I painted the whole milk bottle white (you could certainly choose a different color.
I had actually considered doing black). I used chalk paint so it would be a matte white (and I happened to have this on hand) but you could use any paint that is meant for glass. Enamel or multi-surface acrylic paint could make the bottle dishwasher safe as well if you plan to actually use it as a drinking glass and want to be able to wash the inside and outside thoroughly.
I applied 3 coats of paint, letting each coat dry for an hour in between. This is always the hardest part of crafting for me, the waiting… I want to just immediately start in with the next step, but trust me, you want to wait between coats.

Now, the creative part.
There are so many options for how you can decorate this milk bottle but I am going to tell you how I did mine, step-by-step, and then you can take your own creative liberties!
I browsed Pinterest to get inspiration for what I wanted my design to be. Then I used my computer to create a template for my saying so I could trace the lettering. This part is optional, but I like to have a stencil. I find writing on the curved glass can be difficult without guidance.
After printing the text, I used a pencil to scribble on the back side of the image, making sure to cover the whole image. Then I taped the paper to the bottle and traced the letters on the front. This transfers a light pencil guideline onto the bottle.

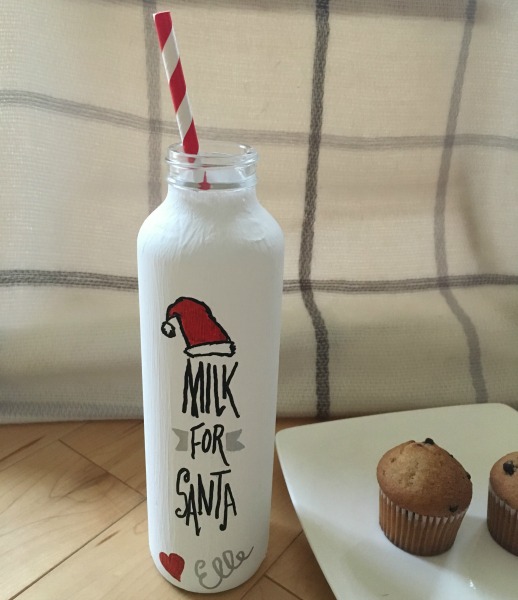
I used oil-based Sharpies to trace the wording and added some other embellishments, the Santa hat and a “signature” from my daughter. I lightly sketched the hat with pencil first. Pencil can be erased, while paint or Sharpie cannot. However, if you do mess up, which I have on other projects, I have used rubbing alcohol to wipe away the mistake and repainted the base color on that section. It’s not ideal because it’s basically starting over, but it’s worked.
Next, I let the everything dry and voila!
I think my milk bottle will mostly be decorative, and maybe have milk in it but not actually be drunk from so any washing will be mostly on the inside. However, if you are using enamel paint there are likely directions on the back how to make it dishwasher safe.
If not, generally when decorating glass and using acrylic or enamel paint and Sharpies (always oil-based) these are the guidelines I follow to make the art a little more permanent and washable:
- Let dry for at least 24 hours but I try to give it 2-3 days.
- After you have let it dry, put your glass on a baking sheet lined with parchment paper, place in the oven and preheat to 350 degrees.
- Once preheated, set timer for 30 minutes.
- When time is done, shut off oven, but do not remove the glass. Let it cool for 2-3 hours in the oven.
When baking glass it is important to put the glass in the oven when the oven is cold to prevent it from breaking.
This method has worked pretty well for me to get Sharpie to stay permanent on glass, however, I still generally hand wash and am gentle over the decorated section. Also, sometimes the colors of the Sharpie change a little. I have read other Pinterest posts that give different temperatures and times for baking. I’ve not tested them out yet.
Again, depending on the types of paint or other materials you used, these directions may vary. Read the directions on the paint.
I can see so many options for decorating these milk bottles. A vinyl cutting machine like Cricut or Silhouette would be a great option for creating the design. My daughter is two, but older kids might have fun drawing on their own or if you used black chalkboard they could decorate the bottles each year with a note to Santa.


